Physical Address
304 North Cardinal St.
Dorchester Center, MA 02124

How to Draw A Braid. Hair can be difficult to draw at the best of times. It flows and moves and can take many different styles and forms.
Also, check our panda coloring sheets.
Still, some hairstyles can be more difficult than others, and drawing certain styles can initially feel a little scary!
The braid is one of those hairstyles that can feel intimidating due to its unusual and specific structure. Still, like all drawing challenges, it doesn’t have to be difficult if you follow the steps!
The first thing to learn about drawing a braid is to draw a straight line across the side with your pencil.
We’ll use a pencil for this part, as it’s just a guide to use when you start drawing the braid.
Once you’ve drawn the pencil line, you can use the pen to trace a thick, wavy line as it appears in the reference image. The reference image gives you a good idea of how wide the curves of the line should be.
For the next step of the braid design, add the first two braids. To do this, start with the right one.
To draw it, draw a long, curved line from the curve into the curved line you drew in step 1.
Then use another line to create the other side of the yarn. You can see how this should be spaced from the reference image we provided.
Once you’ve drawn this one, use the same process to draw the left one.
Once you’ve learned how to draw these two, you’ll be well prepared for the rest to come next in this how-to-draw-a-braid tutorial!
Drawing the first two braids was the most complicated part, so it only gets easier from here!
To continue drawing your braid, use a few curved lines from the already drawn braids to the curvy center line. Feel free to refer to the reference image for guidance!
I’m sure you’re learning now, so as you draw the next four sections, make sure to make them slightly smaller as you get closer to the bottom of the braid.
You do a great job with this tutorial on how to draw a braid!
For the next step in this tutorial on drawing a braid, you can add another curved line to the last strand.
Once you’ve done that, you can draw the bottom part of the braid with two curved lines that almost meet but don’t make it.
The main part of your braid is almost done at this point! Finally, you can add a ponytail to the end of the braid.
You can do this with curved and straight lines as they appear in the reference image.
With the added ponytail, you’re almost there!
Your braid design is complete now, so all you have to do is add some detail lines! As you can see in the reference image, these fine lines can give the impression of separate strands of hair.

You can see how you can draw these lines in the picture, and while I recommend how they appear, don’t be afraid to draw the lines in a way that looks good on you!
There’s no right or wrong way to add details like this, so you should choose what feels best. We’ve shown a way to color it using the attached image, but this is a step where you can show us your creativity!
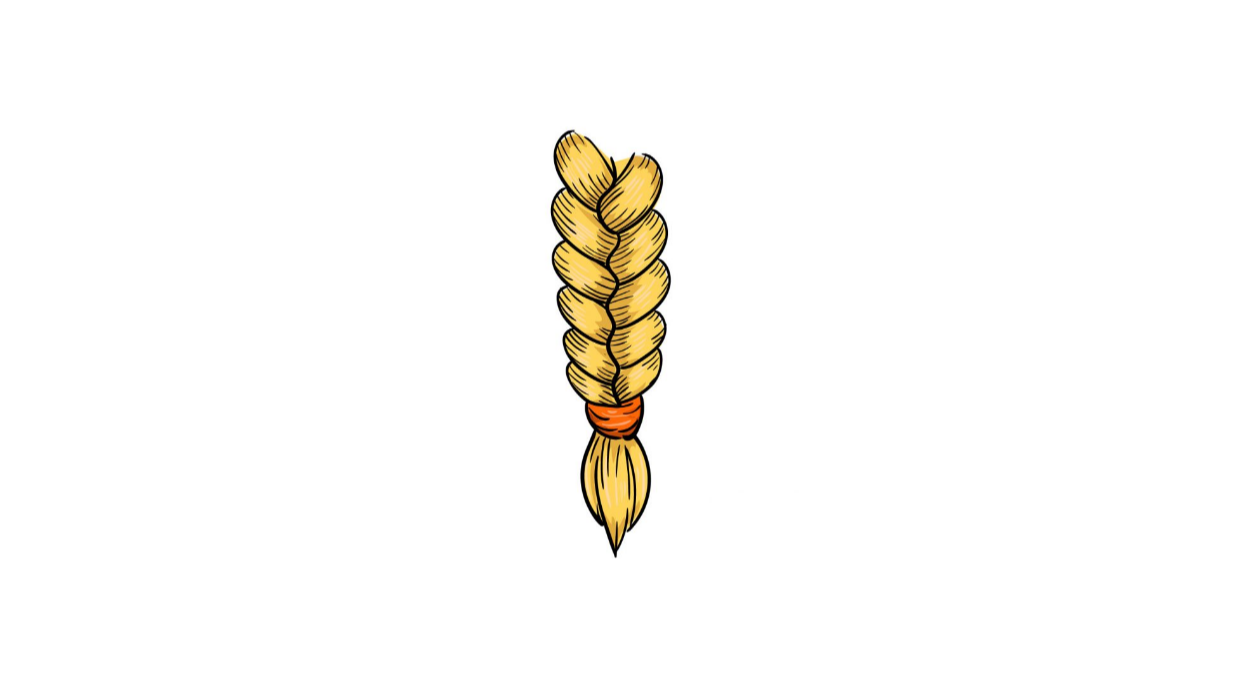
The last step in this tutorial on drawing a braid is the most fun: add some color!

We’ve shown a way to color it using the attached image, but this is a step where you can show us your creativity!
A fun touch you could add would be to use your hair color on your braid design to give it a personal touch!
You can also add some extra details; for example, draw your favorite clip on the braid and color it.
To color your braid design, you can also experiment with artistic colorants.
For example, you can use acrylic paints, watercolors, crayons, and pencils to create beautiful color effects!
The sky is the limit for completing your drawing, and I know it will look stunning when you’re done!
Your Braid Drawing is Finished!
Author bio:
Hello, I am a professional SEO Expert & the brand xperts of the blog, and website on different platforms- we provide a good opportunity for content writers to submit guest posts on our website. We frequently highlight and tend to showcase guests.